Saturday, March 21, 2020

Vim Videos That Wow! Me

I have been using vim for years, but these two videos change how I use vim tremendously.


Mastering the Vim Languages

Chris Toomey give a talk on vim language. If you wanna learn why vim is so great or use vim more efficiently, you should start with this one. Chris also includes lots of resources in this talk if you want to follow deeply into this topic.


 Let Vim Do The Typing

Presented by George Brocklehurst, talking about vim completing, basically. I found the talk very practically useful and somewhat different form Toomey’s talk.

Saturday, August 25, 2018

Tracking movement of the moon shot


Everyday Challenge: Day 15,

With knowledge how to take a moon picture from yesterday post, I now can combine those pictures into an interesting one.

By taking each moon 5 mins apart on a tripod, and combine them with photo editing tool like Gimp (sorry, not photoshop). I am able to track the moon moves across the night sky.

Gimp is a powerful tool, so much so I have to sense a decent amount of time to learn how to combine to create this picture. Anyway, it worths to try

Thursday, August 23, 2018

Moon shot with A7Rii Super35 + Canon 200mm F/2.8@ F11.


This moon shot was taken by A7Rii using Super35 mode, with Canon 200mm F2.8@F11 (equivalent to ~ 300mm).

To get this shot, you need to take the shot underexposure, which allows the camera to see all detail of the moon surface. Otherwise, you can only see a big white ball.

By using the lowest possible ISO, the noise is reduced significantly. By setting the aperture to F11, the lens will perform at the best and also further underexposure the image. By manually setting speed to 1/200-1/300, I can simply handheld. Make sure, that you do not underexposure too much.

A7Rii in Super35 mode made 200mm to be 300mm, which help a bit.

Here you have it!

Wednesday, August 22, 2018

Is your camera sensor clean?

Let ask a question, is your camera sensor clean?

Here how I answer this question. I take out the camera, in this case, a Sony A7R, and put on my trusty Canon 100mm Macro with MC11. I set the aperture to F11 and take pictures of the sky. I choose an area of that sky that quite featureless.

The key is to set aperture to F11. This allow the dust on sensor appear on the picture. If you use low aperture like, F2.8, F4, the dust images get blurry too much and you can not see them. If you see one at this aperture, the dust has to be a big one.

The first picture is the jpg come out directly from the camera. Look closely, you will see a few blurry spots here and there, especially the lower right corner of the pictures. I think it is not so bad. In normal shooting, the dust images won't show up in the pictures.


Could I say this sensor clean?

Far from it! ... Let turn up the contrast, as shown in the second picture, then a lot more dark spot show up.

It is impossible to keep your sensor dust free because every time to change lens, some dusts will get into your sensor.

So there is no "big" dark spot show up in the pictures, I probably won't do any thing about it. May be, I just use "Rocket-Air Blower" to blow some dust away from the sensor If I see some spots. Otherwise, I probably send the camera to clean ... and that $$.


Monday, August 18, 2014

Setup Brother Printer on 64bits debian base linux, like CrunchBag or Ubuntu

I just get a new printer - Brother HL-2270DW series. It's compatible with linux and brother have drivers for it! Unfortunately, the driver is for 32bits (i386) systems. So what next?

I assume USB connection.

It is simple really. All we have to do is to config our system to support multiple architecture, aka Multiarch, and then use the 32bits drivers. You can read about debian Multiarch here.

First we have to add i386 architecture support to your system by:

## add i386 support
$ dpkg --add-architecture i386
## and update the system
$ apt-get update
Then we need the add i386 support library. Since la32-libs is replace by libstdc++:i386, so we have to do the following
## add i386 support libraries
$ apt-get install libstdc++:i386
Once we finished adding support library for our i386 architecture, then we just simply install drivers downloaded from Brother website:
## install drivers start from "LPR printer driver"
$ dpkg -i hl2270dwlpr-2.1.0-1.i386.deb
## and then "CUPSwrapper printer driver"
$ dpkg -i cupswrapperHL2270DW-2.0.4-2.i386.deb
We can download the drivers from brother website here:

To confirm that drivers install correctly, just run:
$ system-config-printer

Saturday, April 5, 2014

Linux on Android using Complete Linux Installer: Hiccup and Fix!

The benefit of having a full linux distribution running on android device, such as Asus transformer Prime/Infinity, is up to who you are. For me as a developer, it's really a great platform for me to play around with new language, practice new skill and, experiment with new tools without mass up with my work notebook. For sys admin, it's quite a nice to have a full bowl linux to work on ... And I think Complete Linux Installer does a good job helping me to setup a linux distribution on android device.

Nothing perfect thou. There are a few hiccup ... a few annoying issues which may or may not have a fix for it. Keep in mind, the app allow to have a full linux running on android by chroot to a linux image, and connect to it with vnc or ssh. There will be some issues that there is no solution for it (or there is but I don't know :p)

Where is my eth0?

First hiccup after boot the system is this error message:
If connecting from a different mach ... android device use the address below:
eth0: error fetching interface information: Device not found

This is a simply the /root/init.sh expect the network interface to be "eth0". Unfortunately, that is not always true. To find out which interface you have, use "ifconfig". In my case, it is "wlan0".

To fix this, simply edit /root/init.sh script. Change "eth0" to "wlan0", in my case, and you will be done.


How much disk space I have?, "df" issue

This is quite annoy when simple command like "df" (diskfree) doesn't work at all. It's not report any thing. This is because the "df" command can not read file table which provide this information. Fortunately, there are easy solution for issue if all you want is to see how much disk space available.

By simply alias "df" to take which file system to report on, it's solve the problem. This time you edit /root/.bashrc script to add alias, as shown. This fix is only report disk space on "/" and "/sdcard", and it's not useful for other system tools which require to have device information.


Where is my external sdcard?

Like me, you probably have external microsd card install with the system. Is the "/sdcard" refer to this external sdcard? ... No it's not. It's the internal sdcard that come with the prime tablet.

Sorry to say, I don't know the answer to this question because the external sd card is mount on "/Removable/SD" which can not be access in the chroot system. There might be a way to allow access to /Removeable/SD from the chroot system, but I do not know now. If you know, please comment below. :)

Can I create normal account? What do I need to know?

Obviously, running the system as root is not a good idea. First thing, create a user using command
$ adduser new_user

What you need to do after that is adding the new_user to the following groups:
This will allow new_user to use network and also access both read and write to internal sdcard.

I also recommand to add new_user to group: sudo, users, ssh, and crontab if you plan to use it.

However, it's still booting directly to root! Obviously, you can just type

$ su -l new_user

And you will be right at home. However, it's an extra step to do after boot, which kinda annoying.
However, we can do this automatically but edit "/root/init.sh" once again.


The line "/bin/bash -i" is responsible for spwan a shell. We just has to replace that line with
"/bin/su -l new_user" and the system will boot directly to the new_user.

That's it! for today. See you next post ... which I will try to get more memory to the system by enabling swap image. :)

Using Linux on Android with Complete Linux Installater and debian testing-Large image.

If you have android tablet/phone and you wish to use full linux on it. You are in luck. I am running one on Asus Transformer Prime. You need to root the device thou. You can find out how to root your device from xda-developers.com.

Here is going to be my experience with "Complete Linux Installater" app, which you can find it on the app store for free. There is also a donation version too, $3.50.

What I like about Compete Linux Installer, is simplicity, good guide line and various of distribution of linux you can choose from. 

I start with debian testing (Jessie) small image. It's 2GB image file, and very easy to setup ... just follow the instruction and it will be done in second after long downloading and extracting of the image. There are a few hiccup that might consider annoying. I have fixed some of these "hiccup", and shared with you later.

Setup with debian testing LARGE image file:

Get back to my major issue. Since 2GB is too small after I try to get some serious work on it, I try debian testing LARGE image. This time it's not that simple any more. I find couple major issues with it.

Get The Right File:

First of all, the zip large image that I download by follow the app is damaged and can not be extract. I try different mirrors, always get the same result. So I googling and find this 

which you can directly download. Notice that there are couple of  images you can download from,
debian-testing, debian-8.LARGE.ext2 and debian-8.LARGE.ext4 ... The question is which one?

If you follow the app, it will download debian-8.LARGE.ext2 file, which about 500MB. This is the damage one. Since debian-8.LARGE.ext4 is about the same size, it's also damage one. The one that you have to download is

debian-testing.LARGE.ext4 (1.0GB) file.

Change the Script:

After a long wait for downloading and extracting, I expecting this image should work like a charm! ... Unfortunately, the bootscript is expecting the file system to be ext2, not ext4.  This can be solved pretty easily by changing the bootscript. The bootscript.sh is located here:
/data/data/com.zpwebsites.linuxonandroid/files/bootscript.sh
Use any editor you like, obviously :) ... and looking for the word "ext2", and the line is look some thing like this:
$bbox mount -t ext2 /dev/block/loop255 $mnt
$bbox is refer to "busybox" which the app provided. You can change to the one that you like, but I won't recommend. $mnt is the mount point, which is /data/local/mnt. Since the large image that I download is using ext4, I would have to change "ext2" to "ext4". The line become:
$bbox mount -t ext4 /dev/block/loop255 $mnt

At this point you should be about to boot up the debian testing LARGE image with ext4 file system, and enjoy 3.5gb space!

Next post, I am going to talk about hiccup that annoyance me and how I fix it.

Saturday, February 16, 2013

Mortgage Biweekly Option, the true.

Couple weeks ago, a little landed on my inbox. It's about "Biweekly Option" payment for mortgage.
Essentially say, if I setup a smaller biweekly payment (half of the monthly payment), I will reduce my loan term from 30 year to about 23.9 years. Therefore, I will save money on interest!

Ding! ... save money ... shoter team loan ... wow all good stuff! :D

So I called the number that they give me on the letter ...

Wait a minute, this is not my lender ... it's another financial instrution. What is going on here?
So I drop the call right away, and then start googling to find out how the "Biweekly Option" really work ... or worthwhile!

In short: No.
Long answer: it's depend, if you really want to pay off your mortgage early ... ya do it!  BUT do it yourself. You don't need the service offer in the letter.

Here is where I findout about this Biweekly option ... the true!

Just in case, if you wonder. I did call my lender, and they don't offer option to pay biweekly. They just say "No".

Sunday, October 28, 2012

Luminance HDR - A Linux HDR tool that I can actually use.

About a year ago, I came across Luminance HDR during a search
for linux HDR tools. I wasn't so impressed back then.

Now, after try Luminace HDR again, I was stunned by the result I get. 
And Yes, I find a Linux HDR tool that I can actually use! 

I took these pictures at Franciscan Monastery, a lost gem in DC.
You will find original photos at the end of the post.


Tuesday, October 23, 2012

Thursday, October 18, 2012

Canon 5D Mark II vs Mark III

First of all, I have to admit that I do not have neither 5D Mark II or Mark III. But I do own a Canon 5D thou. It was a little surprise for me when I heart about Mark III because I was still thinking about upgrade to Mark II.

Don't get me wrong, I love my 5D and I don't need the video features. That why I am still thinking about upgrade to Mark II (and never did). Should I upgrade to Mark III then? or Should I just save some money by upgrade to Mark II? ... Here what I found out:

You can find full spec and full review of Mark II here and Mark III here.

5D Mark II Mark III
Price  discontinue 1,799 3,459
year Aug 2005 Sept 2008 Mar 2012
Photography Features
LCD Size 2.5" 3.0" 3.2"
Max Resolution 4368x2912 5616x3744 5760x3940
(megapixels) 12.7 21.2 22.3
Processor Digic II Digic 4 Digic 5
ISO (Auto) 100-1600 in 1/3 stops 100-6400 in 1/3 stops 100-25600 in 1/3 stops
(manual) 50, 3200 50, 12800 and 51200 50, 51200 and 102400
Auto focus points 9 9 61
Viewfinder Coverage 96% 98% 100%
Continuous Drive 3 fps (60 JPEG, 17 RAW) 3.9 fps (78 JPEG, 13 RAW) 6 fps
Exposure Compensation ±2 EV (at 1/3 EV, 1/2 EV steps) ±2 EV (at 1/3 EV, 1/2 EV steps) ±5 EV (at 1/3 EV, 1/2 EV steps)
AE Bracketing ±2 (3 frames at 1/3 EV, 1/2 EV steps) ±2 (3 frames at 1/3 EV, 1/2 EV steps) ±3 (2, 3, 5, 7 frames at 1/3 EV, 1/2 EV steps)
Muli-exposure no no up to 9 exposures
HDR in cameras no no 5 options
Horizon level no no dual axis leveling
Weight 895g 850g 950g
Memory Card 1 CF 1 CF 1 CF and 1 SD
Video Features
1080 n/a yes yes
720 n/a no 60,50
640 n/a 30,25 30,25
Longest clip n/a 12 mins (approx) 30 mins
Microphone/ Headphone Jack n/a mono/no mono/yes
Audio level ctrl n/a yes (pre recording) yes (while recording)
Aperture control in video n/a no yes
Histogram in video n/a no yes
Chromatic Aberration fix n/a no yes
Time code support n/a no yes

Overall, Mark III is an improvement over Mark II in the photography featrues, little bit bigger censor, faster processor, wider range ISO, more auto focus points, two memory cards, etc. Mark III is greatly improve on HDR support, such as, HDR in cameras, AE Bracketing and Multi-exposure, and 6 fps would help to get better HDR pictures. For me, I wish to have 5 or 7 frame AE Bracketing for quite some time.

Beside HDR, I would say, other improved features are nice the have. It's won't convince me to pay almost double to get Mark III.

Obviously the different between Mark II and Mark III is in video features. I don't know much about it but I can see that Mark III is greatly improve over Mark II. If the video features are important to you, then you should consider Mark III.

On the other hand, if you are looking for your first canon full frame camera, spend some time looking at  Mark II, specially at this price. It is a great photography tools and it is must better than 5D. It come with video features that you can explore. If I am not mistake, Mark II is very successful in this area too.

For me, I already have 5D. I am still happy with it and I don't really need video features. So I probably wait and see how Mark IV is going to look like.

Sunday, October 14, 2012

Setup Keyboard Layout for OpenBox

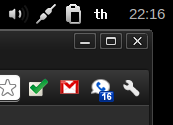
OpenBox doesn't have a keyboard layout setup program to assist you, as ubuntu or window does. However it is not that difficult to do it yourself.  There are two things that you need to do: add new keyboard layout and show what current layout you are using. The easiest way to setup US and Thai keyboard layout for OpenBox is to add this two commands into you OpenBox autostart file, locale at: ~/.config/openbox/autostart

## enable thai keyboard 
setxkbmap -layout us,th -option grp:toggle
xxkb &
The command setxkbmap is setting layout to US(us) as the first layout and Thai (th) as second. I choose right-alt key to switch the layout by using option 'grp:toggle'. Learn more about other layouts or options, look at the file '/usr/share/X11/xkb/rules/base.lst'. You might want to read resources I listed at the end of the post too.

The second command xxkb will give you a layout switcher and indicator on your panel. Make sure you have the "&" at the end of the line, otherwise the autostart won't finished. The xxkb need a config file '.xxkbrc' in your home directory. Here is mine:

Saturday, October 13, 2012

Observer Pattern In Ruby

Let add one more pattern into the design pattern series by consider Observer pattern. In observer pattern, there is a subject which will be observed by multiple observers. When an event happen with the subject, all observers who registered with the subject will get notify. One obvious example of this pattern is you and my blog. If you are subscribed to my blog, you will get notify when my blogs get updated. This relation between subject and observers provide a clear pattern. It's clear enough to be implemented as a module in ruby standard library, called Observable.

In this post, I am going to use this observable module to implement a program that allow me follow stocks prices, and also calculate the average over time.

Assume that the stock market allow me to read current stock price with a function call "get_current_price(stock_symbol)".  With this method, I can implement a simple class, SimpleStockWatcher, to read the current price and calculate the average as follow:
class SimpleStockWatcher 
  def initialize(symbol)
    @symbol = symbol
    @sum = 0
    @count = 0
  end

  def update
    price = get_current_price(@symbol)
    @sum += price
    @count += 1
    show(price)
  end

  def show(price)
    puts "Symbol #{@symbol}"
    puts "  Time:          #{Time.now}"
    puts "  Current Price: #{price}"
    puts "  Average:       #{@sum/@count}"
  end
end
If I want to monitor Bank of America (BOA), and Google (GOOG), I implement the following loop:
stocks = [ SimpleStockWatcher("BOA"), SimpleStockWatcher("GOOG") ]
loop do
  stocks.each(&:update)
  sleep(1)
end
This loop will print the stocks price and average very second.

Now, I want to add more analysis, say 30 or 100 days moving average. No problem, I add more code into the SimpleStockWatcher. Then every second we get the stock prices, average, 30-day moving average, and 100-days moving average.

Let get a bit more complicate, I want to show only current price and 30-days moving average for stock "BOA". For "GOOG", I want to show current price, the average, and 100-days moving average. How do I satisfy this requirement?

Thursday, October 11, 2012

Transformer Prime and Linux Installer

Android is a great platform for consuming. I means, using it for internet, email, read books, keep your notes, etc. One may go as future as write a book, create art work, edit photos, compose musics, etc. There is an app for every thing you want, even for a linux enthusiastic like me. What I mean is I can use linux side by side with android.

First of all, you can find instruction to install Ubuntu on prime here on the xda-developers site, if you are interested. It's risky, but you will get full ubuntu running on the prime. I won't go into this approach thou. It's not what I aim for.

For me, I prefer another method, chroot to a linux image file. This method allow me to run linux along side with android. I can do things that android does great, like reading email, facebook, websurfing, view pictures, read books, etc. I also can do things that normally android won't allow you. Actually, I can do pretty much every thing that linux provide you.

The idea is to create a linux image file on your android device, mount the image file to android system, and chroot to it.

Guess what, there is an app for that too. It's call "linux installer". Unfortunately, it's some what doesn't work perfectly on transformer prime.

The app work only with rooted device, which mean you need to unlock you prime. After installed linux installer 4.1 (the version at the time this blog is written) from the market to your prime, you have to setup before you can go ahead with installation by select menu and setup. By default, there are couple options are disable. I choose to enable all of them, specially
  • Bind Android
  • Allow write to /system
  • Allow remount with dev/exec
should be turn on. It's make the chroot integrate better with android.

By default, the debian/squeeze is chosen for distribution/version. Don't forget to choose your hostname, and domain name. I leave the chroot launcher script and other options untouched. 

For the loop file location, I leave it at the default location. You should take note where it is. My is "/storage/sdcard0/Linux.loop". It's important that you need to know about this.

For the loop file size, it's need to be above 300MB. However, we are not going to use this loop file anyway, so choose some thing small, say 300.

Tuesday, October 9, 2012

Carpeting and Traffic light - Conclusion

Don't you feel the approach that I used in the previous post, traffic light setting, is a little bit overwhelming? I don't blame you if you do. But it does demonstrate some thing important, it's show what we can do with the problem.

First, with this approach, I always get an answer which may be "no, I can not do it in 3 turn per cycle" or "yes, I can". Not only that, I get a specific light setup, a pretty good one. Even with more complicate situations, say bigger intersections, I still definitely get an answer.

I also know that there is no way to let every one pass through safely only 2 turns per cycle, no matter how much I try. It is definitely good to know your limit, isn't it?

Moreover, if I have a problem that have hundreds of directions. Once I turn the problem to a graph, I probably going to look up a solution of graph coloring, which suit my case, or use one if it's already out there. Either way, I have a pretty good idea how to solve my problem.

You probably realize by now that I am using mathematical abstraction, a graph, to help us to understand, learn more about limitations and provide a solution to the problem.

This concept is important in computer science, because when you try to solve problem with computers, you actually turn a real problem into an abstract problem in computers. Mathematics give you a good guide line now to implement these abstractions. This what you are going to learn when you go to collage for computer degree, learning to solve problem using mathematics, and learn how to implement it in computers

Sunday, October 7, 2012

Carpeting and Traffic light, what do they have in common? - Part 2

In the previous post, I define a carpeting problem. It quite a simple problem that can be described, including a solution in couple paragraphs. The traffic light problem is quite more complex.

Traffic light setting: I want to setup a traffic light on a intersection (figure 1), which A, B, and C are two-way streets, while D is a one way street, and have to make sure that every one can get thought the intersection safely.

figure 1
If I setup the light as follow:
  1. let A go to B and C, and block every one else
  2. let B go to A and C, and block every one else
  3. let C go to A and B, and block every one else
  4. let D go to A, B and C and block every one else.
There will be 4 turns signal for each cycle. I  ensure that every one get their turn, and pass through the intersection safely. 

You may notice that while we let A go to B and C, in the same time C can safely go to A. This raise the question, can we do 3 turns signal in each cycle, and still let every one get through safely?

Carpeting and Traffic light, what do they have in common?

Nothing ... you may say so. And I completely agree with you. However, what I am talking about is two problems, Carpeting a house and Traffic light setting. They may have some thing in common that might surprise you. I have to be more specific, haven't I?

Carpeting a house: I want to fully carpeting this house with one condition. I want every room that connect to each other have different color. For the room that is not directly connect, may share the same color.

figure 1
For this particular house, kitchen (K) and living room (L) are connected, they have to have different color. Assuming the small area in front of rest room (R) is belongs to kitchen. All bedroom (MB, B1 and B2) can have the same color. In this case, 3 colors is enough. But can I do this with two color?

Remember the small area in front of restroom is belongs to Kitchen, so B1 and B2 are not directly connected, so living room.
figure 2

Let draw this floor plan differently (figure 2):  All the room are connected directly to kitchen, except the master bedroom (MB). We have to choose two different colors for kitchen and living room, say C1 for kitchen and C2 for living room. Then we can use C1 for master bedroom and C2 for bedroom 1 and 2. Using two colors is possible then.

Saturday, October 6, 2012

Square Photography

Look interesting right? :)
It change my perspective. Why don't you try it!


Friday, October 5, 2012

Rails Namespace, Nested Resource and form_for

Couple days ago, I ran into a problem when I try to use namespace, nested resources and form_for in Rails 3 and ruby 1.9.3. I try to setup some thing similar to this, a namespace :admin, with nested resources :menus, and :menu_items. Here is the routes.rb:
namespace :admin do
  resources :menus do
    resources :menu_items
  end
end
I think it's probably common used case. Unfortunately, I got this error when I try to create a new MenuItem in menu_items/_form.html.erb
undefind method 'admin_menu_items_path' for #<#<Class ...
...
 1: <%= form_for(@admin_menu_item)do |f| %>
      ...
17: end
I realize that the standard scaffolding won't work for me, so I start googling. Right away, I get a lot of hits. It's seem to be a common issue. However, the solutions create quite a confusion for me. I try different solutions, some looking good but don't work! .. Here is what I find working.

 First, in admin/menu_items_controller.rb, method 'new':
def new 
  @menu = Admin::Menu.find(params[:menu_id])
  @menu_item = @menu.menu_items.build
  ...
end
It load up the @menu, and build @menu_item, nothing surprise me. I also get rid of than "admin" prefix. It's simpler that way.